Cellmark Great Crested Newt eDNA Water Sampling Instructions
Cellmark's GCN eDNA sampling kits are designed to make your job as easy as possible - they match Natural England protocols.
Kit Contents and Care
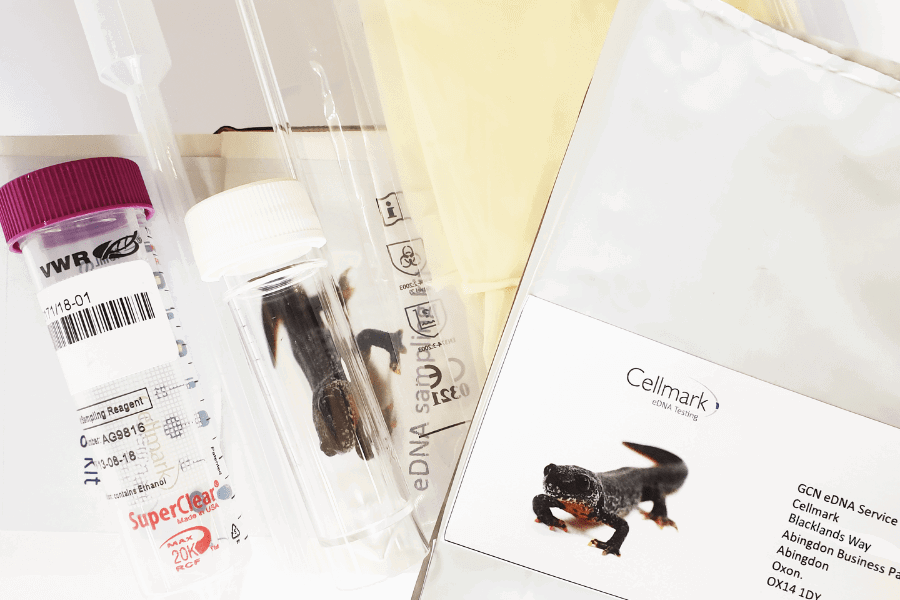
Each kit will contain the following items:
- A sterile 30 mL ladle
- A sterile self-supporting Whirl-Pak plastic bag with 710 mL capacity
- A sterile 10 mL pipette to resample the pond water
- 6 sterile 50 mL centrifuge tubes containing preservative (Absolute Ethanol (200 Proof))
- 1 pair of sterile gloves
- 1 Mail-Tuff return envelope
- 1 Sample Return Form
- 1 instruction sheet
The sample tubes, packaging and sample return form have all been pre-barcoded for your convenience.
Ensure unused kits are kept at room temperature in an appropriate solvent store, consistent with Health & Safety Regulations. Please use the kits before the labelled expiry date.
Collection Timing and Conditions
A single visit to the target pond should be made between 15th April and 30th June, during the great crested newt breeding season. Use one kit per pond up to an area of 1 hectare. Beyond this, use an additional kit for each additional hectare.
eDNA samples can be collected at any time of day and in any reasonable weather conditions, including light rain. Try to avoid heavy rain as this makes sampling more difficult and might increase the risk of cross contamination (e.g. splashing of mud which could contain great crested newt DNA from wet ground).
Studies show that unpreserved amphibian eDNA decays slightly more quickly in full sun than shaded conditions, becoming undetectable after 8 and 11 days respectively (Pilliod et al., 2014).
Sample Collection Process
Follow the steps below to collect your samples:
- Identify where you can take the 20 samples from the pond. The sampling locations should be spaced as evenly as possible around the pond margin, and if possible targeted to areas where there is vegetation which may be being used as egg laying substrate and open water areas which newts may be using for displaying. Where possible avoid taking samples from areas where the water is less than 10 cm deep.
- Open your kit and put on a pair of sterile gloves. These gloves must be worn throughout Stages 1 and 2.
- Open the sterile Whirl-Pak bag by tearing off the clear plastic strip along the perforated line and then pull the tabs. The bag should stand-up by itself.
- Do not enter the water to collect your samples. Stand on the pond bank or pond edges as this will prevent disturbing the substrate and should limit cross-contamination.
Sample Collection Stages
Sample Collection - Stage 1
- Collect 20 samples of 30 mL of pond water from around the pond using the ladle (fill the ladle each time) and empty each sample into the Whirl-Pak bag.
- Before each ladle sample is taken, the pond water column should be mixed by gently using the ladle to stir the water from the surface to close to the pond bottom without disturbing the sediment on the bed of the pond.
- Once 20 samples have been taken, close the bag securely using the top tabs and shake the Whirl-Pak bag for 10 seconds. This mixes any DNA across the whole water sample.
Sample Collection – Stage 2
- Label each conical tube with the date, your name (sampler), and the pond name after the sample ID number.
- Using the clear plastic pipette provided take 15 mL of water from the Whirl-Pak bag and pipette into a sterile tube containing 35 mL of ethanol to preserve the eDNA sample (i.e. fill tube to the 50 mL mark).
- Close the tube ensuring the cap is tight. Then shake the tube vigorously to mix the sample – this is important to prevent potential DNA degradation.
- Check each tube has not leaked during this process. If it has, remove the cap and check the seal and that the tube hasn’t cracked. If the tube is intact, replace the cap and wipe dry before returning it to the box. Repeat this for each of the 6 sample tubes.
- Empty the remaining water from the Whirl-Pack bag back into the pond.
Sample Collection – Stage 3
- Place the boxed samples in the Mail-Tuff return envelope and add the return label.
- Complete the Cellmark eDNA Sample Return Form which identifies the specific sampling locations on Cellmark’s final test report.
- Place the form in the Mail-Tuff return envelope and finally fold the envelope over before sealing it – this is designed to stop the sample tubes from moving around in transit.
- Collect up your instructions, gloves, pipette, ladle and any excess packaging and please dispose of thoughtfully.
Sample Return
Returning Your Samples
Packaging instructions for returning samples are provided in your kit on the Cellmark eDNA Sample Return Form.
Health & Safety
Caution – the reagent contains ethanol. For further information please refer to the links below:
www.cellmark.co.uk/safety/MSDS-Ethanol.pdf